01 Aug 2025
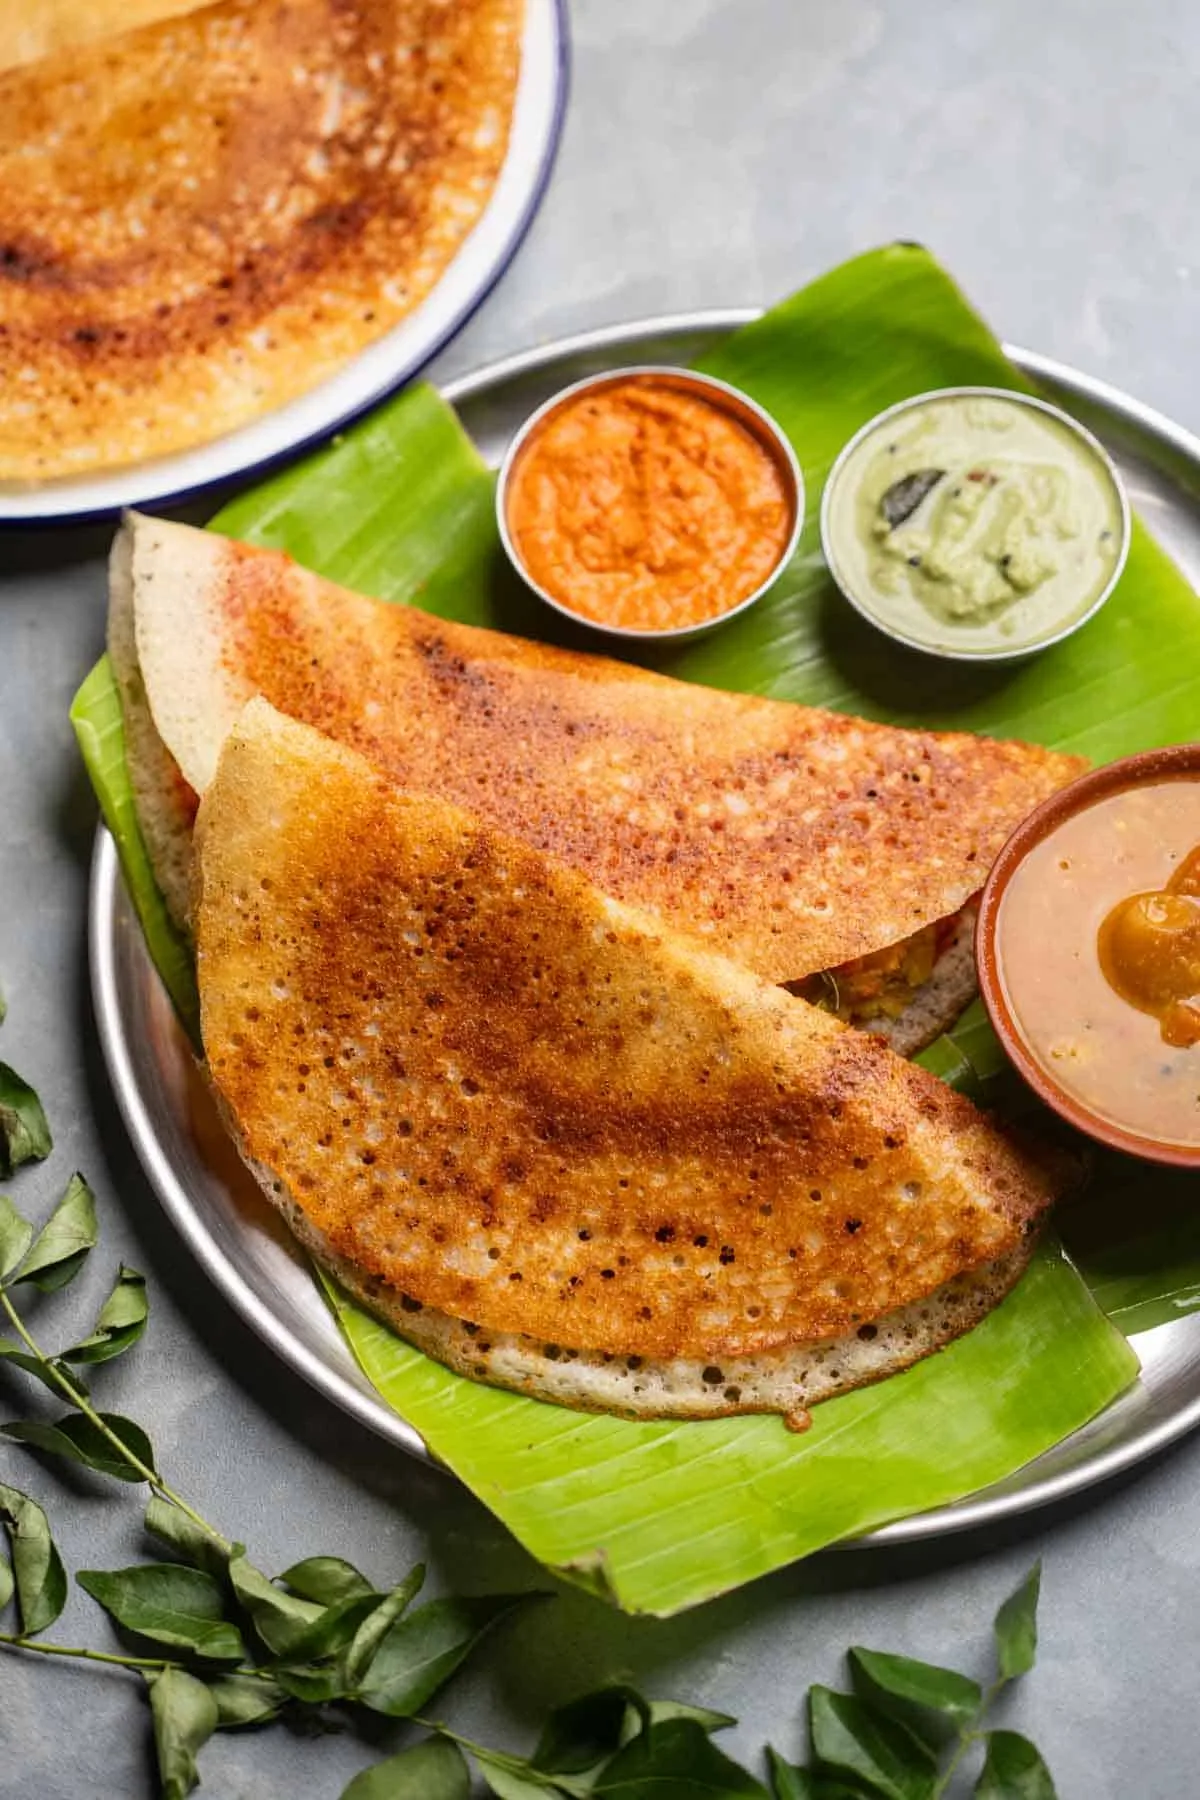
There’s nothing just like the consolation of a scorching dosa recent off the tawa, and this recipe with my straightforward do-it-yourself batter will show you how to nail it proper at dwelling – so you can also make dosas simply how you want, everytime you need!

Hey dosa/dosai lovers – I’m speaking to you! We’re from Bangalore and dosa is a weekly ritual for us – if not a number of instances within the week! And with all of the varieties to select from, be it Neer Dosa, Millet Dosa, Mysore Masala Dosa, I can go on and on….
I can have dosa any time of the day, although there’s one thing about beginning your mornings with one straight off the pan. With this recipe (a part of my NEW Idli Dosa Batter Collection!), I’ll present you how you can make the traditional dosa EASILY from scratch – together with the idli-dosa batter – so that you get that signature golden crisp and comfortable heart each time 🤌🤌🤌
And the very best half? There’s completely nothing to be intimidated about as a result of making the do-it-yourself batter is extremely straightforward and comes along with simply 20 minutes of hands-on time (the remainder is simply soaking/fermentation time!). Make it as soon as, and also you’ll by no means return to purchasing retailer purchased batter – belief me!
Idli Rice – that is quick grain parboiled rice which we use for finest outcomes. In a pinch, sona masoori rice additionally works
Urad Dal – used for that creamy, ethereal texture
Flattened Rice/Poha – for that fluffy, ethereal texture of the batter
Cooked Rice – this for that excellent crispiness!
Fenugreek Seeds/Methi – aids the fermentation course of and provides to the style
Chilly Water – to stop the batter from heating up whereas grinding
Salt – added after fermentation to to season the batter
Troubleshooting: In case your batter sticks to the pan whereas spreading, it implies that both the pan is simply too scorching or the batter is simply too thick. You may scale back the flame first and if the issue persists, you’ll be able to pour some water into the batter to skinny it out.
Notice:
For those who’re questioning what pan to make use of to make dosas, I’ve acquired you. Each work, however right here’s how they examine:
Greatest for: Individuals who make dosa often, love a crisp texture, and don’t thoughts the maintenance
Greatest for: Occasional dosa makers or anybody who prefers low-maintenance cookware
Dosa is created from a fermented batter of rice, urad dal, poha, and methi seeds. It’s naturally vegan and gluten-free!
There could possibly be just a few causes for this:
– Batter could also be too thick – skinny it barely with water
– Tawa not scorching sufficient
– Not sufficient oil/ghee
– Batter hasn’t fermented effectively – fermentation takes anyplace from 12 to 24 hours. As soon as fermented, the batter would have a slight dome form with specks and bubbles on high. You must be capable to scent a barely bitter scent coming from the batter. This scent means it has fermented.
Sure — however for the crispiest, most flavorful dosa, do-it-yourself batter all the time wins.
You may, however each poha and cooked rice provides lightness and helps with fermentation. We additionally use them as a result of we make ONE batter for idli and dosa and this provides you optimum outcomes for each. It may be skipped however I extremely suggest it.
We season the batter AFTER it has fermented – so be certain to do that when you see that the batter is prepared. If making dosas, add 3/4 teaspoon of salt and ½ tsp of sugar and blend effectively (the sugar helps add color to the dosas when cooking). If making idli, add ¾ teaspoon of salt and blend effectively.
If you’re unable to unfold your dosa, it implies that both the pan is simply too scorching or the batter is simply too thick. You may scale back the flame first and if the issue persists, you’ll be able to pour some water into the batter to skinny it out.

When you’ve tried out this dosa recipe, there’s no going again. With this recipe up your sleeve, you’ll have restaurant-style crisp dosas on the common — and your breakfast (or every other meal that you just select to make this for like meee :P) recreation won’t ever be the identical.
For those who favored this recipe, remember to keep tuned for extra as a part of my Idli Dosa Batter collection, and ship me your recreations over on my IG @my_foodstory!
Forestall your display screen from going darkish
Day 1 – morning
1 ½ cups idli rice or parboiled rice, ½ cup skinned urad dal, ¼ cup poha, 1 teaspoon methi seeds
Wash and soak idli rice, urad dal, poha and methi seeds in sufficient water in a approach that there’s at the least an inch of additional water over the rice and dal.
Day 1 – night
As soon as the grains have soaked for about 8 hours, drain the surplus water from the bowl.
Grind the idli rice-urad dal combine with cooked rice till virtually clean with approx. 1 ½ cups water and 4-5 ice cubes in a mixer grinder. Add further water if required. The consistency must be such that it could possibly depart a thick coat on the again of a spoon and falls in a ribbon like consistency when poured with a ladle. The bottom batter ought to really feel very barely gritty between your fingers.
¼ cup cooked rice, 1 ½ cups water, 4-5 ice cubes
Pour the batter right into a bowl that’s giant sufficient so that there’s room for the batter to rise. Combine the batter with clear palms as proven within the video – this is a crucial step because it helps within the fermentation so please don’t skip it.
Cowl the bowl and put aside to ferment. Go away it in a heat, dry place away from direct daylight to ferment. Fermentation takes anyplace between 12-24 hours relying on the humidity and temperature at your home. The hotter it’s, the sooner it’ll ferment.
As soon as fermented, the batter ought to have develop into virtually 1.5 instances its measurement with a slight dome form and a wrinkle, bubbly layer on high. You must be capable to scent a bit of sourness within the batter. This scent means it has fermented. Whether it is too bitter, it has fermented an excessive amount of! You should utilize a spoon to verify the batter – the feel must be frothy with air bubbles. It will yield approx. 1.75 litres (6-7 cups) of batter.
take 1 cup of batter in a bowl, add salt, sugar and blend effectively.
1 cup dosa batter, ¼ teaspoon salt, ⅛ teaspoon sugar
Warmth a non-stick pan or a seasoned forged iron dosa tawa over medium warmth. As soon as scorching, pierce the onion half with a fork, dip in oil & rub it on the tawa. This prevents the dosa from sticking to the tawa.
1 onion reduce into half horizontally
Improve the warmth to medium. Drizzle a spoon or two of oil or ghee across the edges and within the heart, cowl with lid & prepare dinner for 30 seconds.
2 teaspoons cooking oil or ghee
Take away the lid and let this roast for 1-2 minutes until golden brown on medium.
Flip it over and roast for 30-seconds. Flip it again, fold and serve.
Comply with the identical steps for making the remainder of the dosas.
Energy: 561kcal, Carbohydrates: 111g, Protein: 17g, Fats: 4g, Saturated Fats: 2g, Polyunsaturated Fats: 0.3g, Monounsaturated Fats: 1g, Ldl cholesterol: 9mg, Sodium: 211mg, Potassium: 193mg, Fiber: 9g, Sugar: 2g, Vitamin A: 3IU, Vitamin C: 4mg, Calcium: 67mg, Iron: 4mg
This text was researched and written by Navya Khetarpal.
Subscribe to get the latest posts sent to your email.

Leave a Reply